Raspberry Pi Pico vs Arduino Nano: which board wins?
Pico vs Nano: speed, memory, pins and voltage compared in plain English, so you buy the right board for your first robot or gadget.
Some links in this guide are affiliate links: if you buy, TechForLive may earn a commission at no extra cost to you. Details.
- The Pico runs at up to 133 MHz with 264 KB of memory. The Nano runs at 16 MHz with 2 KB.
- The Pico uses 3.3 V logic and its pins are not 5 V tolerant. The Nano uses 5 V logic.
- The Pico runs MicroPython or C. The Nano runs Arduino code in the Arduino IDE.
- For Wi-Fi, buy the Pico W or the Nano 33 IoT, not the plain boards.
Raspberry Pi Pico vs Arduino Nano: the short answer
The Pico and the Nano look alike. Both are small boards about the size of a stick of gum. Both plug into a breadboard, and both run your code without a computer attached. They suit the same first projects: a blinking light, a sensor that reads the room, a small robot that follows a line. The difference sits inside, in the chip that does the work.
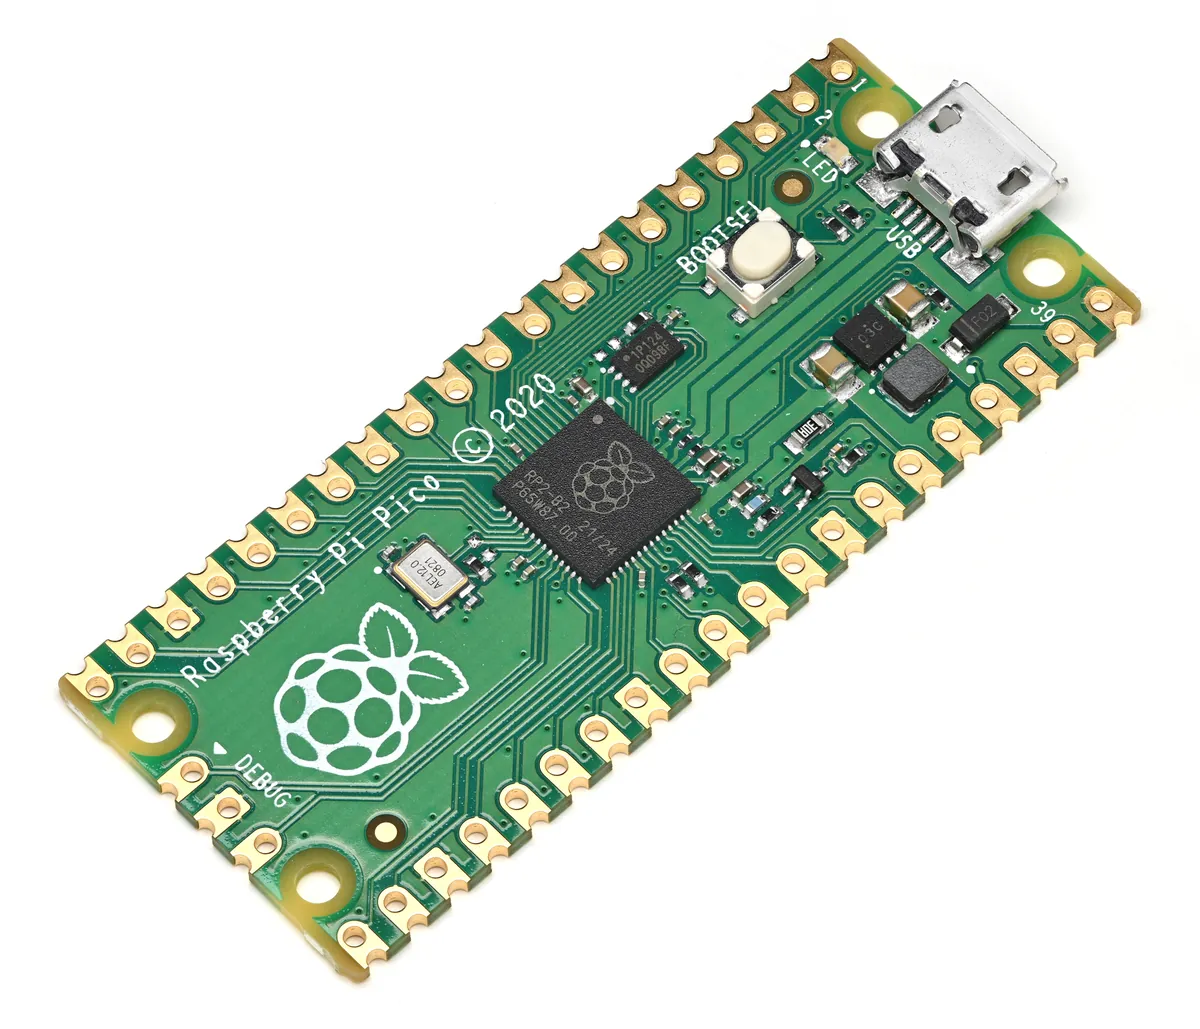
The Pico runs on Raspberry Pi's RP2040 chip. It has two processor cores, a top speed of 133 MHz, 264 KB of memory while it runs, and 2 MB of flash. The Nano runs on the ATmega328P chip. It has one core, a speed of 16 MHz, 2 KB of memory while it runs, and 32 KB of flash. Those numbers decide what each board can hold.
Think of it as a workshop. The Pico is the bigger room with more benches. It holds longer programs and more sensors at once. The Nano is the smaller room you already know how to use. It holds simpler programs, and the Arduino world has a ready-made library for almost every sensor you will meet. The Pico also leaves more of your budget for sensors and motors.
| Feature | Raspberry Pi Pico | Arduino Nano |
|---|---|---|
| Chip | RP2040 | ATmega328P |
| Cores | 2 | 1 |
| Clock speed | Up to 133 MHz | 16 MHz |
| Memory while running | 264 KB SRAM | 2 KB SRAM |
| Storage for code | 2 MB flash | 32 KB flash |
| Pins | 26 GPIO | 14 digital, 8 analog |
| Logic voltage | 3.3 V | 5 V |
| USB plug | Micro-USB | Mini-USB |
| Wi-Fi | Pico W only | Nano 33 IoT only |
| At a glance | Answer |
|---|---|
| Pico chip | RP2040, dual-core |
| Pico clock | Up to 133 MHz |
| Pico memory | 264 KB SRAM, 2 MB flash |
| Nano chip | ATmega328P, single-core |
| Nano clock | 16 MHz |
| Nano memory | 2 KB SRAM, 32 KB flash |
| Logic voltage | Pico 3.3 V, Nano 5 V |
Speed and memory: what the numbers mean for your project
Clock speed is how fast the chip ticks. The Pico ticks at up to 133 MHz, about eight times the Nano's 16 MHz. It also has two cores, so it can do two jobs at once. It can read a sensor on one core while it drives motors on the other. The Nano has one core doing one job at a time. For a blinking light, none of this matters. For a robot that reads sensors and steers at the same time, it does.
Memory while running, called SRAM, is the space your program uses as it works. The Pico has 264 KB of it. The Nano has 2 KB. That gap is the real difference between the boards. A program that stores a small map or a list of readings will fit on the Pico. It will run out of room on the Nano. The Nano's 2 KB is its tightest limit, and it is the limit beginners hit first.
Flash is where your code lives when the power is off. The Pico has 2 MB. The Nano has 32 KB, and 2 KB of that is taken by its bootloader, the small program that loads your code. A big library, such as one for a display, can fill a Nano on its own. The same library fits on the Pico with room to spare. If your project needs a screen or many sensors, the Pico's memory is the safer bet.
Pins, voltage and sensors: the 3.3 V vs 5 V trap
A pin is a connection point where the board talks to the outside world. The Pico has 26 of them. Each can be an input, an output or a special job such as talking to a sensor. The Nano has 14 digital pins and 8 analog pins. An analog pin reads a sliding value, such as how bright a room is. The Pico has 3 analog inputs, each reading with 12-bit detail.
Voltage is where beginners break boards. Logic voltage is the voltage a pin uses to mean on or off. The Nano uses 5 V. The Pico uses 3.3 V, and its pins are not 5 V tolerant. A 5 V signal fed into a Pico pin can damage it. Many older sensors run on 5 V. They wire straight into a Nano with no extra parts. On a Pico, they need a level shifter, a small part that translates 5 V signals down to 3.3 V.
Check the voltage of every part before you buy it. Most new sensors sold for Raspberry Pi work at 3.3 V and suit the Pico. Most classic Arduino sensors run at 5 V and suit the Nano. If your parts box holds 5 V modules from an Arduino kit, the Nano saves you adapters. If you are buying fresh parts, choose 3.3 V parts and the Pico's extra pins.
Programming each board: the first hour
The Nano is the easiest board to start with. Install the Arduino IDE, the free program from Arduino. Plug the Nano in with a Mini-USB cable. Pick the board and the port from the Tools menu, then press Upload. Your code is C++ written in the Arduino style, and the IDE checks it before it uploads. The first program most people run blinks the small LED built into the board.
The Pico gives you a choice. You can write MicroPython, a beginner-friendly language, in the Thonny editor, which is free. You can write C or C++ with Raspberry Pi's software kit. The Arduino IDE can program the Pico as well, once you add its board support. That choice is a strength and a small hurdle. A beginner should pick one language and stay with it until the first project works.
The Nano's biggest strength is its library pile. A library is ready-made code for a part, written by someone else. The Arduino world has libraries for almost every sensor, display and motor driver sold. Most come with an example that works out of the box. The Pico has libraries too, but the Arduino pile is still wider. When your sensor has an Arduino example and no Pico example, the Nano saves you an evening.
- Install the Arduino IDE on your computer and open it.
- Plug the Nano in with a Mini-USB cable.
- In the Tools menu, pick the Arduino Nano as the board and the right port.
- Open File, then Examples, then Basics, then Blink, and press Upload.
- For the Pico, hold BOOTSEL, plug in the USB cable, and drop your program file onto the drive that appears.
Blink on the Arduino Nano
void setup() {
  pinMode(LED_BUILTIN, OUTPUT);
}

void loop() {
  digitalWrite(LED_BUILTIN, HIGH);
  delay(500);
  digitalWrite(LED_BUILTIN, LOW);
  delay(500);
}
Blink on the Raspberry Pi Pico in MicroPython
from machine import Pin
import time

led = Pin(25, Pin.OUT)
while True:
    led.toggle()
    time.sleep(0.5)
Which board for which project
Take the Pico for a robot. A line follower, a small rover or a robot arm needs several motors, several sensors and a program that juggles them all. The Pico's memory holds that program, its pins take the sensors, and its two cores can split the work. Add an L298N motor driver board and the Pico drives two motors while it reads distance and light.
Take the Nano for a simple gadget. A plant waterer, a temperature display or a door alarm uses one or two sensors and a short program. The Nano holds it easily, the 5 V parts wire up directly, and the Arduino examples get you there fast. If the project uses a part you already own from an Arduino kit, the Nano is the path of least resistance. Either board works for a first step into robotics.
Wi-Fi changes the choice. The plain Pico and the plain Nano have no wireless radio. For Wi-Fi, buy the Pico W. It adds a 2.4 GHz radio to the Pico. Or buy the Nano 33 IoT, the Nano-family board with Wi-Fi built in. Do not expect the plain boards to connect to your network. A project that sends readings to your phone needs one of the wireless versions.
- First robot with motors and sensors: Pico, for memory and pins.
- Simple gadget with 5 V parts: Nano, for direct wiring.
- Project that needs Wi-Fi: Pico W or Nano 33 IoT.
- Following an Arduino tutorial: Nano, so the code matches.
- Big program with a screen or many sensors: Pico, for flash and SRAM.
Myths you can ignore about Pico and Nano
The faster board is always better. No. Speed helps only when the program needs it. A plant waterer that checks the soil once a minute does not care whether the chip ticks at 16 MHz or 133 MHz. The better board is the one that fits the parts you own and the code you can follow.
Arduino code runs on the Pico out of the box. Not quite. The Pico runs MicroPython and C, and the Arduino IDE can program it, but only after you add board support for the RP2040. Code written for the Nano usually needs small changes on the Pico, such as different pin numbers and the 3.3 V limit.
The Pico needs a Raspberry Pi computer. No. The Pico is a microcontroller board, not a tiny desktop. It runs on its own once programmed, and any computer with a USB port can program it. You do not need a Raspberry Pi 4 or 5 to use one.
The Nano is obsolete. No. It is older and slower, but it is still sold, still supported in the Arduino IDE, and still the board most tutorials use. Obsolete means nobody supports it. The Nano has one of the largest support piles of any board in this size.
Quick answers
Can the Raspberry Pi Pico run Arduino code?
Yes, with board support added to the Arduino IDE. The Pico runs MicroPython and C out of the box. Code written for the Nano usually needs small changes, such as different pin numbers.
Is the Pico better than the Nano for beginners?
It depends on the project. The Nano is simpler to start with, and its 5 V pins suit classic Arduino parts. The Pico is better when the program is big or the project uses many sensors.
Does the Pico have Wi-Fi?
The plain Pico does not. The Pico W adds a 2.4 GHz Wi-Fi radio to the same board. The plain Arduino Nano has no Wi-Fi either. The Nano 33 IoT is the Nano-family board with Wi-Fi built in.
Can I use 5 V sensors with the Pico?
Not directly. The Pico's pins use 3.3 V logic and are not 5 V tolerant, so a 5 V signal can damage a pin. Use a level shifter, or choose sensors made for 3.3 V logic.
What is the Pico 2?
The Pico 2 is Raspberry Pi's newer board, built on the RP2350 chip. The original Pico in this guide is still sold and still a fine starting point. Check that your code matches the board you own.